Accidental Systems Administrator

Virtual Lab entry on the LTD Wiki
This post picks up where the Virtual Lab: Creating a 2008 R2 Domain Controller post left off. Now that we have a new domain up and running we need to add some systems and users.
Creating Accounts
After installing the Active Directory Directory Services role, there are several new tools available from the Administrative Tools section of the Start menu. Throughout the remainder of the article we will be working through the “Active Directory Users and Computers” tool.
Domain Administrator Account
The first account we are going to create on the new domain is a Domain Administrator account. Even though this is a virtual lab environment, we don’t want to get in the habit of using the built-in administrator account.
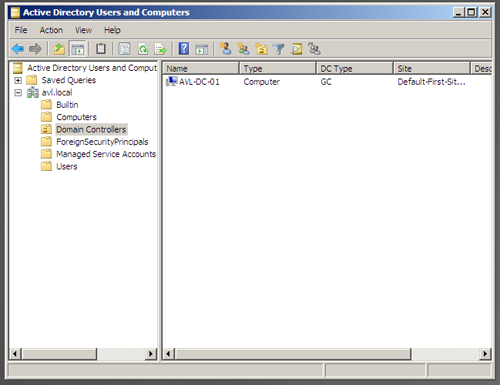
Open the “Active Directory User and Computers” screen and explore the default groups that have been created. As this is our first visit, there are no custom folders in our tree.
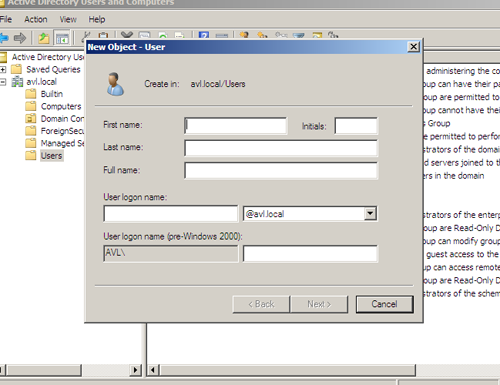
To add a new user to the default “Users” folder we will right-click on the folder, select “New”, and select “User”. This provides us with a dialog to enter the basic user information.
After entering the general user information and pressing next, we are presented with a request for the user’s password and password options. As we have not yet configured the password policy, the default policy is still in place.
Completing the wizard gives us a brand new member with basic Domain User permissions.
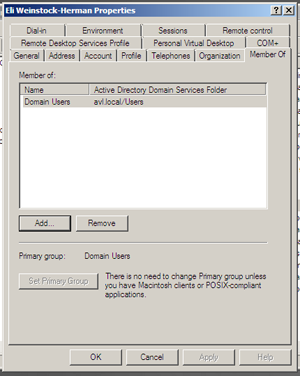
To elevate the permissions of the user across the domain, we will assign them membership to the Domain Admins group. Open the user’s properties panel (right-clicking the user and select “Properties”) and select the “Member Of” tab.
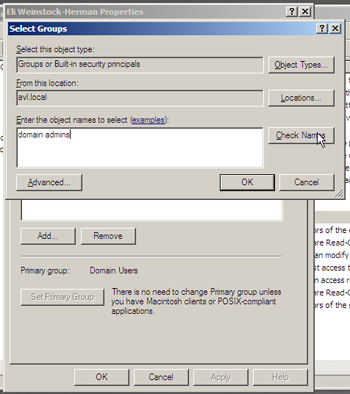
Pressing the “Add” button brings up the search dialog. Enter “Domain Admins” and press “Check Names” to quickly find and select the Domain Admins group.
Press Ok twice and the user is now part of the Domain Admins group.
Service Accounts
Service accounts are an important part of a network. Many companies will rely on common accounts, like the built-in Administrator account, when they are setting up services on the Domain that require domain permissions. There are numerous reasons this is a bad idea:
- Greater Impact – a change to a single user account suddenly has a much wider impact then is intended, potentially causing service outages in disparate places acros the network
- Greater Impact, Frequently – how about password changes? Using one accuont for a wide range of services requires a wider set of work when a single password has to change
- Documentation – using a single account for multiple services requires either good documentation, good guessing, or a lot of overtime
- Security – providing an account with too much security is a potential security hole, a virus that uses a single application as an entry point suddenly has rights to everything on the network
In order to make management of service accounts (and services) clearer, I suggest each service account only have the level of permission on the domain it absolutely needs and that it only be used for a single service or application. This requires more work up front, as you have to not only create individual accounts for each application and service, but more importantly determine what “minimum requirements” means for each one. On the other hand, minimizing planned and unplanned system outages in the future is worth a little extra time.
Creating the Service User Account
Our guinea pig in this section will be the basic SQL install from a previous article. We are going to create a service account for the database server that has limited domain permissions but local administrative permissions. We will be using a middle-of-the-road configuration to create a single user account for all SQL Server services on our domain to run unser, what I would consider to be the minimum level of implementation.
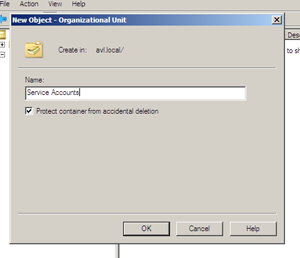
On the AD DS server open the “Active Directory User and Computers” screen again. While there is a “Users” container already available in the interface, we’re going to create a new Organizational Unit (OU) named “Service Accounts” to store these accounts.
To create the new OU, we right-click the Domain (in my case avl.local) and select New -> Organizational Unit. In the dialog we enter the name, in my case “Service Accounts”, and press Ok.
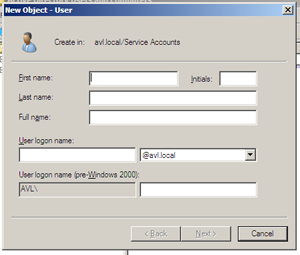
Right clicking the new “Service Accounts” container and selecting New > User opens the new user dialog.
As this is the domain account for our SQL Server services, I have chosen the name “SQL Server Service Account” and a username of “sqladmin”.
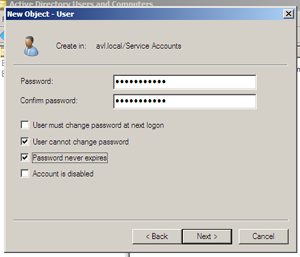
On the next step we will also ensure that our password won’t expire in the middle of the night by verifying the checked defaults and modifying a few.
After viewing the summary in the final step, we press Ok and create the new user. As the user is not going to have any special, domain-wide permissions we do not need to modify their group memberships or other settings. In fact we are done with the account creation until we bring our database server onto the domain and set up the local permissions for the user on that server.
Joining the Domain
Joining a server to the domain is a fairly straightforward process. In this case we will join our database server from prior articles and then we will configure our domain account from the previous section to serve as the administrative account for the database services.
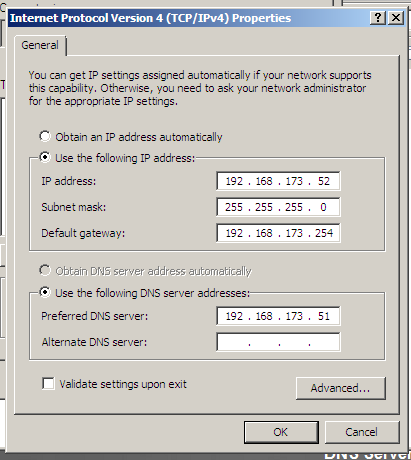
The first step will be to change the network properties of the virtual server. When we first created it we used DHCP and that means that it received a dynamic address and DNS entries other than our new controller.
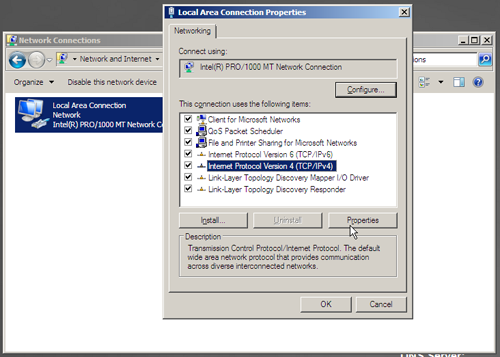
On the SQL Server machine we open the network settings for our adapter, select the “Internet Protocol Version 4 (TCP/IPv4)” value, and press “Properties”.
Assign the server a static IP address on the network and point the DNS settings to the DC. At this point it would also be a good idea to check the “Validate” button to let Windows test the settings when you press Ok.
In my server the validation resulted in a message indicating that Windows couldn’t identify the problem, this translates to “Yes It Works”.
Next we will open the System Properties.
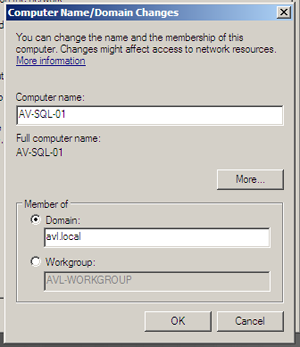
Now we want to press the “Change” button on the “Computer Name” tab. Select the “Domain” radio button and type in the name of the domain from your domain controller.
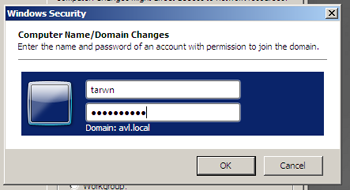
On pressing “Ok” we are asked to enter domain credentials with permission to join the network.
Once we enter our credentials and press “Ok” the system is accepted to the Domain and provides us with the customary reboot request.
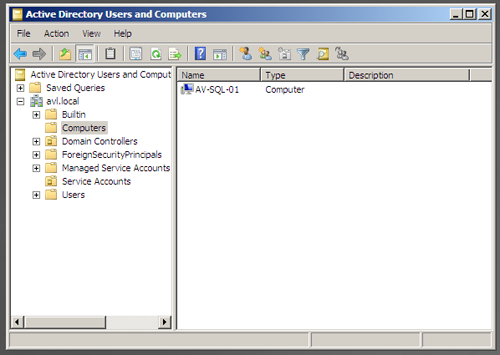
back on the Domain Controller in the “Users and Computers” console, the server has been automatically added under the “Computers” container. This being a simple setup, we have not created our own containers to store our servers in, so we will leave it in the default one (for now).
When the SQL Server has finished rebooting we will log in for the first time with our Domain credentials. In the “Server Manager” we now see that the full computer name and Domain entries reflect the name of the domain.
Applying the SQL Service Account
The last step after adding a database server to the domain is to reconfigure it’s services to use the domain service account we created above. This will allow us to later create domain resourcs that all of our SQL Server systems need to access without having to manage each one individually.
Currently our service account has no permissions on the server, other than as a basic Domain User (and for some of you, it may not even have that level). So the first step is to provide that domain account with local administrator permissions on our database server.
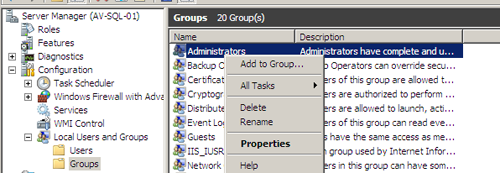
From the open “Server Manager” console, expand the “Configuration” and then “Local Users and Groups” containers, selecting the “Groups” folder. Right click the “Administartors” group on the right side and select “Properties”.
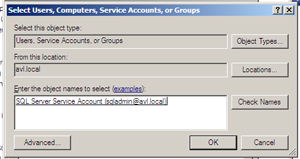
We enter the name of the domain account (in this case AVLsqladmin) and press the “Check Names” button to ensure the account could be found.
Press “Ok” and “Ok” and we are back in the Server Manager again.
The last step is to configure our services to use the Domain account, however this is done a little differently for SQL Server than you might expect.
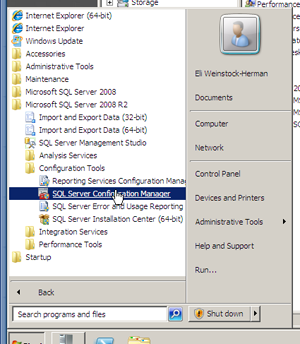
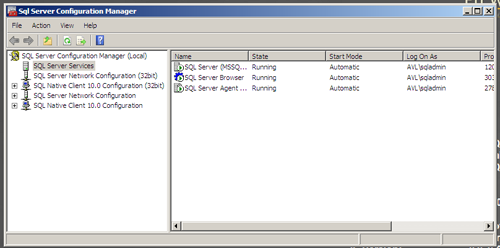
Open the “SQL Server Configuration Manager” from the Start Menu (this would also be a good time to pin it to the taskbar).
To make matters worse, file access escalation (if it works) creates a mess of local folder permissions, so it's highly suggested that you read this workaround.
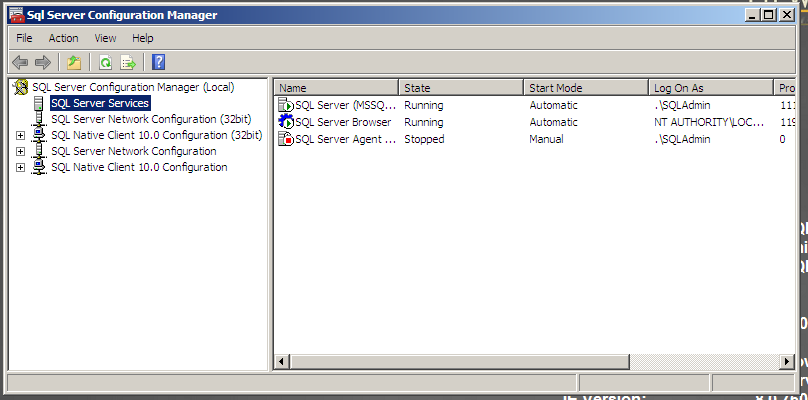
In the Basic SQL Server Virtual Lab post we only installed a few services and configured SQL Server and SQL Agent to use a local account.
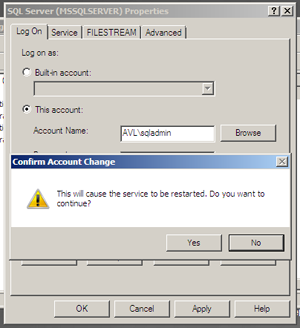
Right-click on each service and select Properties to open the properties panel. Enter the domain account we created above in the Service Accounts section and it’s password, then press Apply. The system will then warn us that a restart to the services is required to continue.
Follow the same instructions for each of the services and we son have all of our services running under the DOmain account.
Wrapping Up
Now that we have the Domain Controller running, we’ve created some accounts, and we have joined our first database server to the domain, it’s time to switch focus back to our database server for a while. Upcoming weeks will focus on some administrative tasks, such as configuring database mail and alerts and building out some scripts to monitor current state and state-over-time values for a few critical performance indicators.



 My roles have included accidental DBA, lone developer, systems architect, team lead, VP of Engineering, and general troublemaker. On the technical front I work in web development, distributed systems, test automation, and devop-sy areas like delivery pipelines and integration of all the auditable things.

