As I’ve moved from project to project, environment to environment, I’ve had opportunities to write unit tests after coding, do test first development, and once use unit tests as a living spec for an external developer (code none unit testing?). One of the biggest friction points, once you settle on a framework, is the constant cycle back and forth between coding, building, running tests, and flipping back. Whether you are using MS Test and the built-in test result viewer, the external NUnit GUI, or a 3rd party test runner, that constant switching is actually stealing precious moments of concentration and time.

The Code, Build, Test Cycle
Imagine for a moment that you have finished writing a piece of code. Maybe it’s the test, maybe it’s the code you intend to test. Instead of kicking off a build and switching mental mode to run the tests, the results simply start appearing. Your test lights up red, then green as you switch to building the logic that satisfies it, never once breaking stride to wait for the test suite to run. Your uncovered code is clearly marked as uncovered before you even finish writing it to press save. It’s magic.
And so very, very addictive.
Hey Kids, Try Some of This
Instead of screenshotting our way through another post, let’s do this together. First download and install NCrunch. Then either download or clone the git repository sample I have set up here: https://github.com/tarwn/TDDAddress
Let’s get started.
What are we doing?

The goal of this exercise is to build an Address class that is the business and formatting logic behind entry of a mailing address. The Address class will expose properties to tell an interface what address fields are available, what they should be labelled, whether the address has all the required values, and a displayable formatted address. In return, it will expect that interface to populate input properties for all the address input values.
This is both as easy and quite a bit harder than what it sounds like. Easier in that we won’t be writing a game or similarly large construct, but harder because the rules for mailing addresses are not as well defined or as simple as you may think. In fact, most websites on the internet do it wrong, and not just for addresses outside the US.
Luckily there are some people that have tried to pull together all of the rules from the USPS and other sources and we can use the results of their hard work to serve as a spec for our Address logic. The rules we are using were sourced from http://www.columbia.edu/~fdc/postal/#general, but I’ve only included a subset of them in this project.
Project Setup
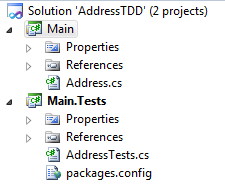
There are two projects in the solution, one to hold the Address class (Main) and one for the tests (Main.Tests).

Just a pair of small projects, nothing scary here
The Address class already has the basic properties it needs, but everything else is up to you.
Let’s Go
Open the solution and enable NCrunch (it finished installing, right?) by selecting it from the top menu and selecting “Enable”. For the most part you can select the defaults when it is enabling. Either select the option to enable all of your tests by default while it is going through the dialogs, or open the Tests window, make ignored tests visible (grey icon on far right) and enable tests for the two projects manually.
Ready? Ok, moving on.
Open up the AddressTests file in Main.Tests and the Specs.md file from the root of the solution. Add the first test to the AddressTests like so:
[Test]
	public void ToFormattedAddress_AddressLine1IsProvided_ItAppearsInOutput() {
		var sampleValue = "Address Line 1";
		var a = new Address();

		a.AddressLine1 = sampleValue;
		var result = a.ToFormattedAddress();

		Assert.IsTrue(result.Contains(sampleValue));
	}
This test is the second rule in the included Specs.md file. After you add the test code, red dots will show up next to executable lines in the test that are on the path to a failed assertion.

Tests are automatically red/failing
NCrunch is building and running the tests behind the scenes as you add more code, automagically. Switching over to the Address class, we’ll notice that it also has dots to indicate portions of the class that are referenced by failing tests. Right-clicking on any of these dots provides more details, options to run tests in debug mode, and so on.
Now add some code to satisfy that test. As you make addition, NCrunch continues to build and test in the background, displaying the updated dots as you work.

Tests and code turn Green automatically
When you get to all green dots, you’re done. No need to stop, just move right on to the next test.
Enjoy the flow.


 My roles have included accidental DBA, lone developer, systems architect, team lead, VP of Engineering, and general troublemaker. On the technical front I work in web development, distributed systems, test automation, and devop-sy areas like delivery pipelines and integration of all the auditable things.

