The purpose of the integration build is to bring potential issues to the surface as quickly as possible. Unit tests run quickly and adding them to the continuous integration build helps flush out defects as close to the beginning of the process as possible. Generally build engines will support unit test framework by directly integrating with them or by providing an ability to execute the test framework and import their results.

Delivery Pipeline – Focus of Current Post
This is the fourth post in a multi-part series on my Continuous Delivery pipeline project. The previous post followed the changes necessary to add unit testing to the MVC Music Store project, a process that ended in the creation of unit tests for the Checkout process. In this post I will configure the CI build job to run the unit test suite, including extra steps necessary to get the MS Test framework runnable on the build server.
Run the Build
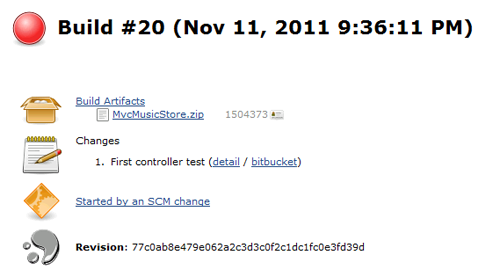
With the automated build already polling changes from the source code repository, this process actually started while I was still writing the initial unit tests for the prior post. With the little red “failed build” dot as my guide, and the ever present twitter bot reminding me on each broken commit, I ended up working on both the unit tests and the server configuration in overlapping steps.
The initial build failure was due to the addition of the MS Test project to the solution. This test project includes necessary references for the MS Test libraries, but unfortunately those libraries are not included in the project or as part of the .Net framework installation. This causes the build to fail with missing reference errors.
There are several blogs and methods outlined to get MS Test running on a build server, including some registry hacks and other unsupported trickery. After spending some time exploring that route, I eventually gave up and installed Visual Studio on the test server.
This is an area that Microsoft could definitely use some improvement in (MS Test integration), but what’s interesting is that many experts on continuous delivery (of which I am definitely not one) actually suggest using the same software on the build server as the developers use to minimize differences in the builds. Whatever the case, the choice of MS Test generally ends with us having Visual Studio on our build server.
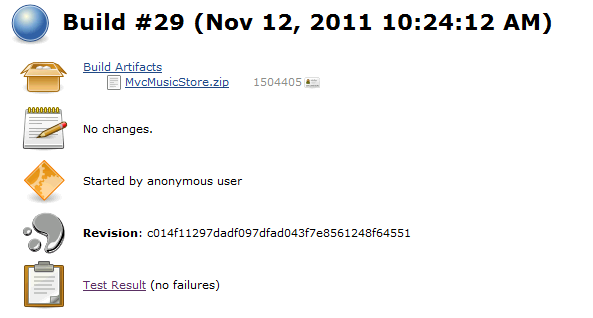
Once the install was completed and I had patched Visual Studio up to date, I was able to run successful builds again.
Run the Tests in the Build
At this point I am building the test project every time the build runs, but I’m not actually running any of the tests. In order to run the tests, I am going to drop to the command line and run the MS Test executable directly. To execute a command directly as a build step, I’ll add a “Windows Batch Command” step to the “Build” section of my CI Build job.
The MS Test executable is located in the Visual Studio folder at C:Program Files (x86)Microsoft Visual Studio 10.0Common7IDEmstest.exe. I’ll execute this against the compiled assembly from the MVCMusicStoreTests project and configure the results file to land somewhere obvious so i can import it later.
Jenkins provides a list of variables we can use in commands, in this case I’ll use the %WORKSPACE% variable to locate the assembly:
“C:Program Files (x86)Microsoft Visual Studio 10.0Common7IDEmstest.exe” /resultsfile:"%WORKSPACE%MvcMusicStoreTestsbinReleaseMyTests.Results.xml" /testcontainer:"%WORKSPACE%MvcMusicStoreTestsbinReleaseMvcMusicStoreTests.dll" /nologo
At this point, I can run the build again but it doesn’t show anything different than before until I open the command log. Inside the command log I can see that the tests ran successfully as part of the build. I also can manually verify the results file was published to the location I specified above.
Integrating the Test Run
To integrate the MS Test results into Jenkins, I’ll use a plugin to map the MS Test format to a format that Jenkins natively understands (Junit XML results). A plugin is available from the “Manage Plugins” screen (Jenkins, Manage Jenkins, Manage Plugins, Click the Available Tab) to do this work for me.
After the plugin installs successfully, there is a new entry in the “Post-Build Actions” section of the job configuration. All I need to do is check the new “Publish MSTest test result report” checkbox and enter the path I used above for the result files.
Now when I run the build again, a new section shows up on the run summary screen that indicates I don’t have any failing tests. Clicking that link for more details, I can see that Jenkins has parsed that results file from MS Test and provided information on all of the running tests and their execution times.
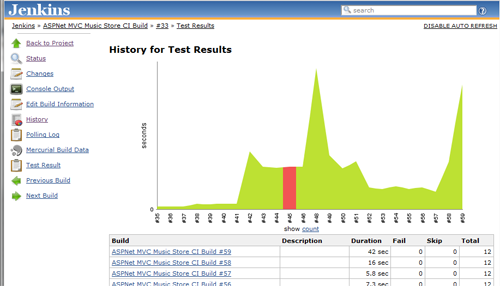
In addition to the test information, there is also a new menu item on the left side named “History”. Clicking this will show historical information on the test runs, including a graph of the execution times and test counts.
Note: If, like me, you didn’t bother to define a server name in the Jenkins configuration panel, you will find that some of these links will not work from a remote server because they are defined with the full server name instead of relative links.
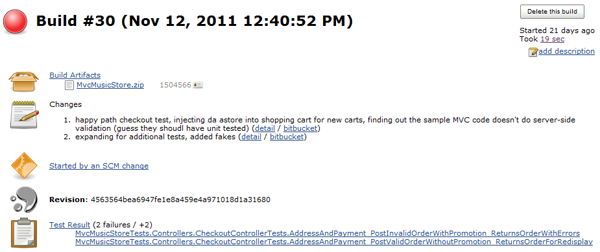
I am naturally paranoid when things work right away, so at this point I purposefully broke a unit test and reran the build to verify it would report it correctly.
And my twitter bot is, of course, more than happy to broadcast that failure far and wide.
Next Steps
With unit tests integrated into the build job, I am nearly done with the Continuous Integration stage of this pipeline. The last thing step will be to verify the packaged code can actually be deployed and to build in the ability to smoke test that deployed code.


 My roles have included accidental DBA, lone developer, systems architect, team lead, VP of Engineering, and general troublemaker. On the technical front I work in web development, distributed systems, test automation, and devop-sy areas like delivery pipelines and integration of all the auditable things.

