


Introduction
Getting into Android development is easy. Just download Eclipse and the Android SDK and you are on your way to brilliant things. And making your first app is easy. One of the first apps we wrote was a close button. In other words. Put a button on the screen and when the user clicks it then close it.
The code
First thing to do was to make it work. This was quit easy. First use the designer to put a button on the screen and then use this code.
Here is the Activity.
package be.baes.CloseButton;
import android.app.Activity;
import android.os.Bundle;
import android.widget.*;
public class CloseButtonActivity extends Activity {
private Button button1;
/** Called when the activity is first created. */
@Override
public void onCreate(Bundle savedInstanceState) {
super.onCreate(savedInstanceState);
setContentView(R.layout.main);
initializeButton1();
}
private void initializeButton1() {
button1 = (Button)findViewById(R.id.button1);
button1.setOnClickListener(new OnCloseButtonClicked(this));
}
}```
And here is the clickhandler.
```java
package be.baes.CloseButton;
import android.app.Activity;
import android.view.View;
import android.view.View.OnClickListener;
final class OnCloseButtonClicked implements OnClickListener {
/**
*
*/
private final Activity activity;
/**
* @param closeButtonActivity
*/
OnCloseButtonClicked(Activity activity) {
this.activity = activity;
}
@Override
public void onClick(View v) {
this.activity.finish();
}
}```
We know this works because we tested in out emulator. But testing it by clicking a button becomes boring really quickly. So we need to automate this.
## The tests
First we create a new Android test project.
<div class="image_block">
<a href="/wp-content/uploads/users/chrissie1/android/android1.png?mtime=1316942131"><img alt="" src="/wp-content/uploads/users/chrissie1/android/android1.png?mtime=1316942131" width="592" height="889" /></a>
</div>
We set the name of our project and we select the project to test.
We should now create a jUnit test Case. Like this.
<div class="image_block">
<a href="/wp-content/uploads/users/chrissie1/android/android2.png?mtime=1316942509"><img alt="" src="/wp-content/uploads/users/chrissie1/android/android2.png?mtime=1316942509" width="556" height="635" /></a>
</div>
Give it a suitable name and set the superclass to <code class="codespan">android.test.ActivityUnitTestCase<CloseButtonActivity></code>. After you made all the errors go away by pressing F2 a few times in Eclipse. You should end up with this.
```java
package be.baes.CloseButton.test;
import be.baes.CloseButton.CloseButtonActivity;
import android.content.Intent;
import android.test.suitebuilder.annotation.MediumTest;
import android.widget.Button;
public class TestCloseButtonActivity extends android.test.ActivityUnitTestCase<CloseButtonActivity> {
public TestCloseButtonActivity() {
super(CloseButtonActivity.class);
}
@Override
protected void setUp() throws Exception {
super.setUp();
}
}
Watch the Setup method and the constructor.
Now it is time to add our tests. First we will test if the button is there.
package be.baes.CloseButton.test;

import be.baes.CloseButton.CloseButtonActivity;
import android.content.Intent;
import android.test.suitebuilder.annotation.MediumTest;
import android.widget.Button;

public class TestCloseButtonActivity extends android.test.ActivityUnitTestCase<CloseButtonActivity> {

	private Intent mStartIntent;

	public TestCloseButtonActivity() {
		super(CloseButtonActivity.class);
	}

	@Override
    protected void setUp() throws Exception {
        super.setUp();
        mStartIntent = new Intent(Intent.ACTION_MAIN);
    }

    @MediumTest
    public void testPreconditions() {
        startActivity(mStartIntent, null, null);
        Button mButton = (Button) getActivity().findViewById(be.baes.CloseButton.R.id.button1);

        assertNotNull(getActivity());
        assertNotNull(mButton);
    }

}
We use a startIntent of main for this because that is the contentview we use (setContentView(R.layout.main);) and we start the activity for that by calling startActivity. Then we get the button and check if it isn’t null.
Now we should check if our activity is finished when we close the button. For this we can use the button’s performClick method.
java
@MediumTest
    public void testIfFinishIsCalledWhenClickIsExecuted()
    {
        startActivity(mStartIntent, null, null);
        Button button1 = (Button)getActivity().findViewById(be.baes.CloseButton.R.id.button1);
        button1.performClick();
        assertTrue(this.isFinishCalled());
    }
And our ActivityUnitTestCase has a convenience method for us called isFinishCalled(). So that we don’t have to mock anything.
Running the tests
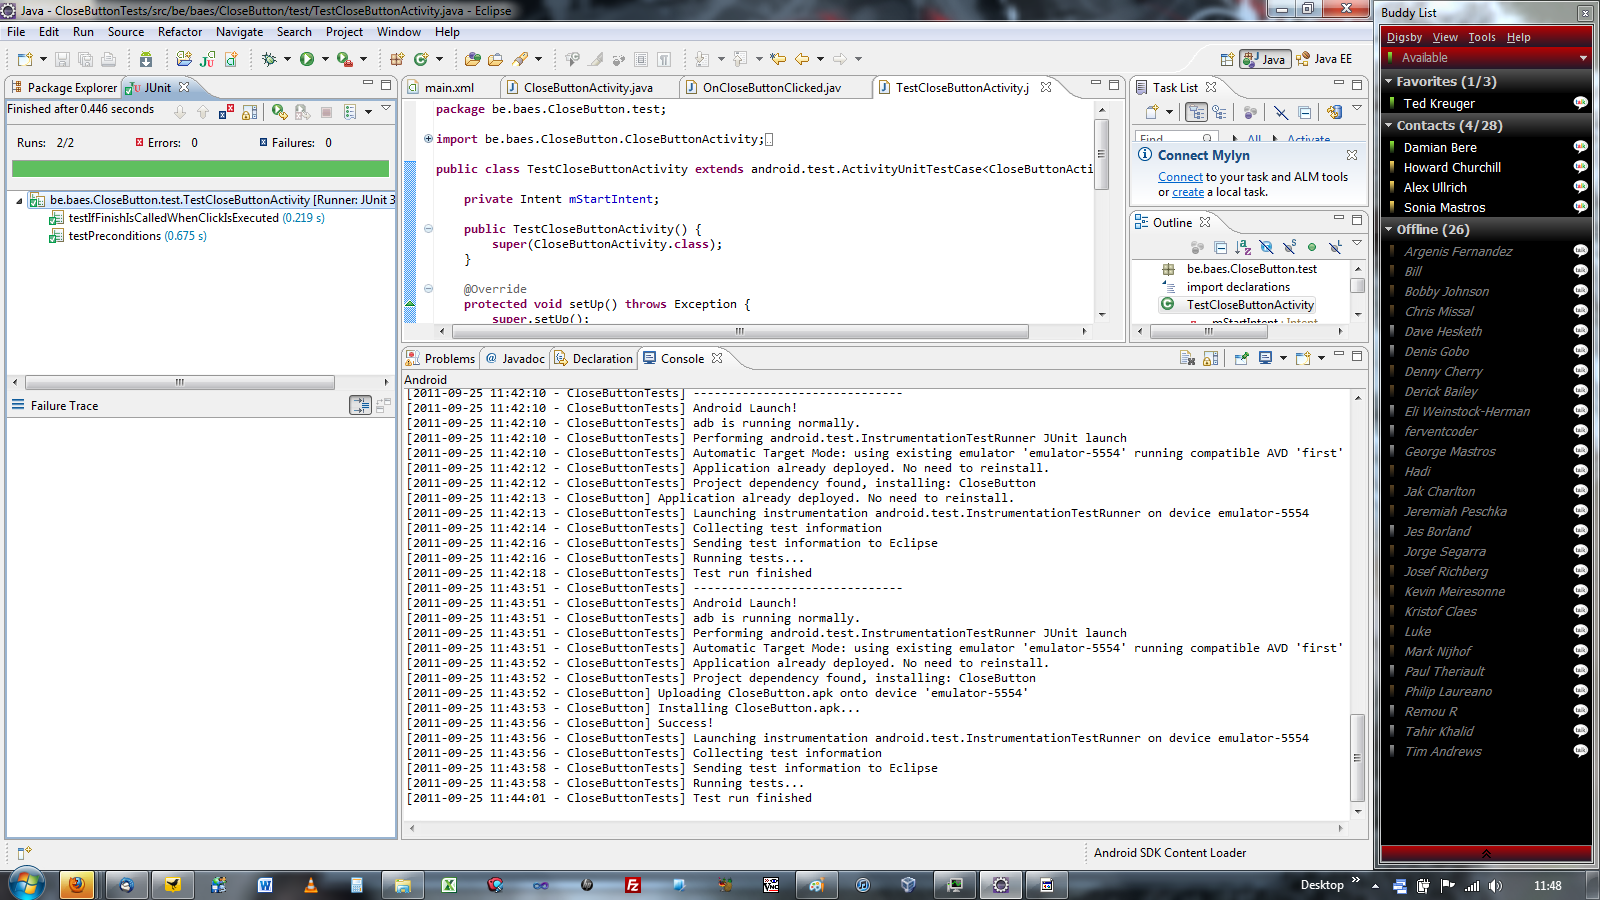
When you run the tests via Run as -> Android jUnit test you will see that the emulator pops open and that the tests are run.
And all goes green.
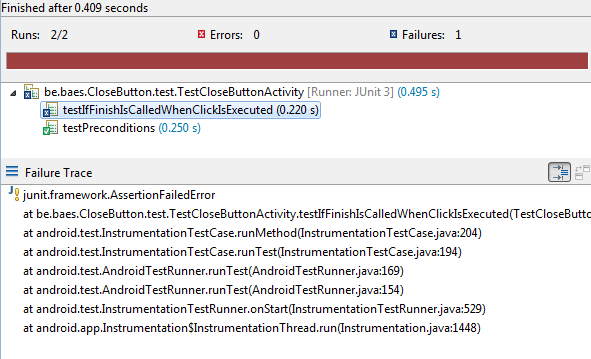
If we want to make sure we can just delete the line this.activity.finish(); in our OnClickListener and see the second test go red.
Conclusion
In the end it was all very simple to do.
 Chris is awesome.
