


The automatic deployment option of Azure Web Sites is really cool and demos well. A few months ago I was curious how far I could push it, whether I could replace more complex projects that I currently deploy from my build server. I had read a couple posts on unit testing during deployment, but so far had not seen anyone take it all the way to interface testing. With tools like CassiniDev, Phantom, and Selenium, this seemed like a real possibility.
So the goal was to create an Azure Website, get the automated deployment working automatically when I commit, run Nunit tests with the Nunit test runner (not the VS runner), and then wire in UI testing with a combination of CassiniDev for hosting the site, Phantom as the browser, and Selenium as the magic that drives the two.
This post covers the parts that worked, creating the Azure Web Site, settings up automated depoyment from the git repository, and customizing the deployment process to run the Nunit test runner, failing the build when a test fails.
From the Beginning
This project started from an empty folder, the goal being to see how far I could push it until I ran into problems.
The first step was to create a github repository for the project and build the basic MVC4 project. I built just a basic MVC4 project with some text on a single page, just enough to show if it was working or not.
The source code is on github: https://github.com/tarwn/CloudPixiesAndGhosts
Azure Website
Once I had a basic “hello World” page and a github repository, it was time to create the Azure Website that would be the deployment target.

Create Azure Web Site – Step 1
The wizard has a github option, but due to the way github permissions work, it ends up needing far more permissions than I want to provide. Instead I have chosen to use the generic “External Repository” option.

Create Azure Web Site – Step 2
The last step is to provide those repository details

Create Azure Web Site – Step 3
And the Azure Website is running:
Azure Web Site – Running
And my basic little web page is picked up by Azure Websites and deployed to the site:

Initial Deployments
Giving us the “cloud” portion of the project name:

It's in the cloud!
There is one last step, though. Because I used the generic “External Repository” option, my code is not being deployed immediately when I commit it.
Luckily Azure Websites exposes a deployment trigger URL that we can plug into github to notify when a new commit is received.
In the Azure Website settings, we copy that “Deployment Trigger URL”:

Configuring the Build triggering – Step 1
And then in the github settings for our project, we paste it in as a WebHoook URL:

Configuring the Build triggering – Step 2
And now each time I commit new code to master, it runs through the automated deployment process.
Add Unit Tests
So far, the example code just has a single page that doesn’t really do anything worth unit testing. This isn’t intended to be a real-world sample, but it does need some simple logic to test.
public ActionResult Index()
{
    return View();
}

public ActionResult Text(string text)
{
    var model = new TextModel(text);
    return View(model);
}
Now I’ve added actions and views for a simple form that asks for a piece of text, submits it, and then shows a response based on whetehr the txt is populated or not.
So we have a form:

Sample Form Web Page
And the page it submits to:
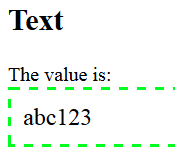
Submission Page
This will be easy to unit test but give us the tooling we would need to do anything more complex.
The unit test project is /CloudSiteTests. My first steps are to add a reference to the web project, add nunit via Nuget, and create some tests.
The 3 initials tests I create pass locally:

Passing Unit Tests (NCrunch console)
Now I add a fourth test to handle the case where I submit the form with an empty input.

And now a failing one (NCrunch Console)
With a failing test in the mix, now we can customize our deployment to run the unit tests and we will know for sure when they are being run correctly.
Customize the Deployment
The next step is to create a custom deployment so we can modify it to also run the unit tests. The Azure Command Line Tools includes a set of commands to generate a basic deployment. We can then take this basic process and tune it to our needs.
1. Install node.js, as azure cli runs on node: http://nodejs.org/
2. Next we need to install the azure cli package. In a command line, run the following:
npm install azure-cli -g
This uses the node.js package manager to install the azure-cli package and installs it for global (-g) use, rather than for an individual project.
3. Open up the root solution folder and check out the options we can use with cli command:
run: azure site deploymentscript -h
4. To generate a deployment script, i’ll specify the aspWAP option and point to the project:
azure site deploymentscript --aspWAP CloudSite/CloudSite.csproj -s CloudPixiesAndGhosts.sln
This generates a .deployment and a deploy.cmd file.
5. Run the deploy.cmd file to test it out
I received an error on my first run because nuget wasn’t available. I enabled package restore on the solution and tried again and it worked. Later I found the same section (Deployment section, subsection 1) of this script was failing on Azure, so I ended up commenting it out entirely.
This may no longer be an issue, the Azure team has been updating things frequently and newer versions may be improved since.
6. Edit the deploy.cmd file to run my nunit tests (after adding the nunit executable to my project):
I added the following section to the command file to run my tests:
:: 2. Tests
echo 2: Build and execute tests

echo 2a: Executing Unit Tests: CloudSiteTests
%MSBUILD_PATH% "%DEPLOYMENT_SOURCE%\CloudSiteTests\CloudSiteTests.csproj" /nologo /verbosity:m /t:Build /p:Configuration=Debug
call "tools/nunit-console.exe" "%DEPLOYMENT_SOURCE%\CloudSiteTests\bin\Debug\CloudSiteTests.dll"

IF !ERRORLEVEL! NEQ 0 goto error
Now when I commit all of these changes and the deployment runs in Azure, I get the following result:

Unit Test Failing Deployment
The log for the deployment captures the results, so I can see exactly which test failed (and also, oddly, that they appeared to run the tests twice):
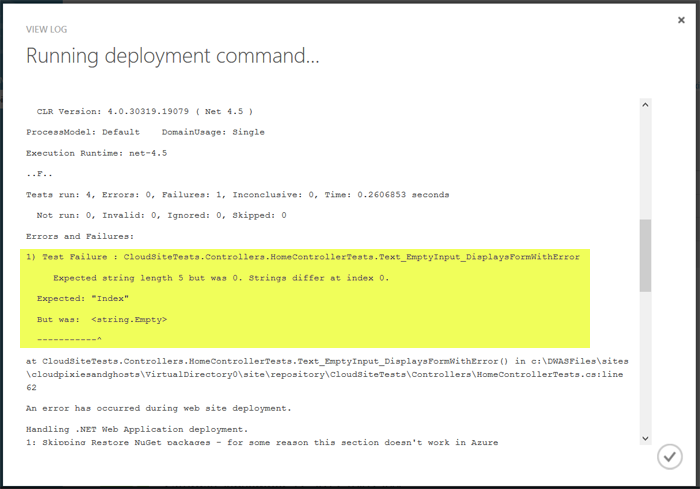
Detailed Log of Deployment Failure
And then when I add some logic to make the test pass, I get this result:

Passing Unit tests and Successful Deployment
And there we have it, Nunit unit tests running automatically during the deployment every time I commit to master.
Sidenote: CassiniDev
As I mentioned before, I originally had set out to get CassiniDev, Selenium, and Phantom all running in harmony as part of the build. I got CassiniDev and Selenium running locally, but couldn’t get CassiniDev to host the site during the deployment:

Network Permissions Denied for CassiniDev
During the setup of the test, CassiniDev’s StartServer command receives an “Access Denied” exception.
This is the /CloudPixiesTests project in the solution, if you’re curious. The Selenium + CassiniDev (ie, the magix pixies part of the repository name) runs fine locally.
Would I Use This For Production?
Personally, I wouldn’t use this as my test and deployment process. I think it’s a great system, but I miss too much from having a build server and have a high enough comfort level with build servers that this simplified setup doesn’t win me much (especially once you add in the limits on what you can do with the built-in staging platform).
I really like the deployment side of this and could see using it as the last mile, with a build server that automatically managed the build process and then either pushes to a repository or merges from the branch it’s building to the one that gets deployed. The only downside to this method would be applying schema updates to storage resources (SQL or serialized documents), as the actual deployment would then be operating asynchronously from your build process, but even that is solvable.
 My roles have included accidental DBA, lone developer, systems architect, team lead, VP of Engineering, and general troublemaker. On the technical front I work in web development, distributed systems, test automation, and devop-sy areas like delivery pipelines and integration of all the auditable things.

