


After configuring SharePoint in the part 7, we will now verify if the configuration was successful and if everything works correctly. The verification process is described in the following MSDN article: Verify a PowerPivot for SharePoint Installation. First of all let's start by verifying the site level integration. Navigate to our newly created PowerPivot site, http://sp2013bi.

Click on the PowerPivot Gallery link in the navigation menu. You probably get the Silverlight icon, telling you to install it. Click on the icon to start the installation process. You might have to refresh the browser after the setup to see take it effect. This step is necessary, the PowerPivot libraries and Power View make use of this technology.

When you upload some PowerPivot workbooks to the PowerPivot gallery, you should get some snapshots on the workbook preview. However, sometimes they do not work.

This can be caused by a multitude of reasons, of which a bunch are listed in this KB. The example I used probably suffered from the problem described in point 7: “The workbook might contain more than one data source. If so, a thumbnail will not be generated.” I uploaded another PowerPivot workbook with a simple pivot on AdventureWorks, and this one worked immediately:

Let’s proceed with the verification. In the navigation menu, click on Site Contents. Next click on add an app.

If you can see the Data Feed Library and PowerPivot Gallery in the list, the PowerPivot feature is integrated correctly.

Next up is the Central Administration integration. Navigate to the Central Admin site on the following URL: http://sp2013bi:2000. Now you can see why you had to choose an easy-to-remember port in the SharePoint configuration.

Click on Manage Farm Features in the System Settings section. The PowerPivot Integration Feature should be active.

Back in the Central Admin, click on Manage Services on Server. The SQL Server PowerPivot System Service should be started. The documentation also mentions also a SQL Server Analysis Services service, however this service cannot be found in the list. I don’t have a SharePoint 2010 installation to verify if it is there in that edition, but you don’t seem to need it in SharePoint 2013. We do know for sure the PowerPivot SSAS service, installed in part 6, is running.

The next step is Manage Service Applications in the Application Management section. The Excel Services application should be started, but more important, so should also be the Default PowerPivot Service Appplication.

Clicking on the application brings you to the PowerPivot Management Dashboard, a key instrument for the IT department to guide self-service BI. However, it is empty.

This might be caused by the fact you haven’t done much PowerPivot related activity on your server, but also because the PowerPivot Management Dashboard Processing Timer Job (quite a mouthful) hasn’t run yet and thus hasn’t collected any data yet. So click on Review timer job definitions to take a look at the job schedules. You’ll see the Dashboard job has a daily schedule.

Change this to an hourly schedule by clicking on the jobs name to go to the edit screen.

Click on Run Now to launch the job immediately. You’ll have to wait for a few minutes until the job has finished and the dashboard has been updated. However, in my case, the dashboard stayed empty. So I investigated the issue! In the job definitions menu, you can click on the Job History link at the left of the screen.

Here I could see the job had failed!

Time to troubleshoot! I used the free download ULS Viewer on Codeplex. After filtering on Excel, I saw the following exception:
The data connection uses Windows Authentication and user credentials could not be deletegated.
Or in other words: you did not configure a domain controller stupid! This is the one place where it has an actual downside of not having a domain controller configured. This issue could have other possible causes as well. This blog post does a nice job of listing most of them: The data connection uses Windows Authentication and user credentials could not be delegated.

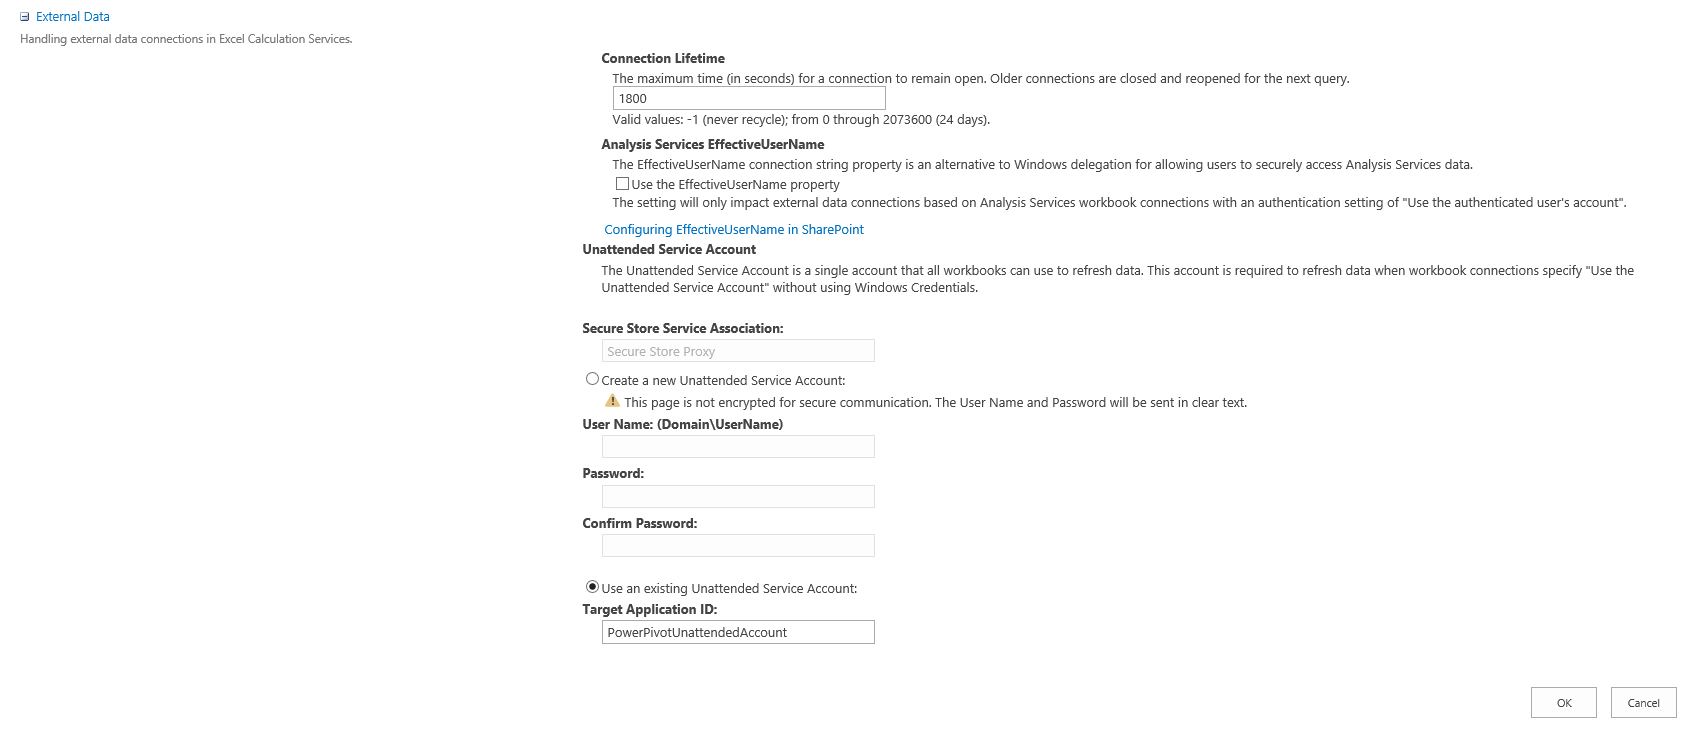
In order to solve this issue, we need to use an unattended account to run the PowerPivot Management Dashboard. We can do this in the Excel Services application. Go to Global Settings and set the Target Application ID to PowerPivotUnattendedAccount (which we configured in part 7) in the External Data section.
Unfortunately, this only solves a part of the problem. If you run the timer job again, you can now see the Activity Chart is populated with one nice little bubble, which represents the dashboard itself. But the Server Health is still very empty. This is caused by the fact that this chart uses some Excel workbooks behind the scenes. These workbooks need to be configured themselves to use an unattended account as well. This procedure is described in the following blog post: Taking your PowerPivot server off the network. It is written for people using PowerPivot when disconnected – for example on an airplane – and thus have no connection to a domain controller. But it also works for people stubborn enough not to install a domain controller. Such as me.
The process is simple. When in the PowerPivot Management Dashboard, click on Site Contents. There go to the PowerPivot Management library.

Click on the GUID.

You’ll see the PowerPivot Management Data workbook and a folder called 1033. In the folder you will find a connection and two workbooks, Server Health and Workbook Activity.

Click on one of the workbooks to open it in Excel Services. There, click on Open in Excel, which will open the workbook locally on your computer.

Go to the Data tab and click on Connections.

There will be only one connection, called Data. Go to its properties. In the connection properties window, go to the Definition tab and click on Authentication Settings for Excel Services.

Set the account to use to None. This will force Excel Services to use the unattended account.

Click OK and repeat the same process for the other workbook. You might get an error about the name for the connection being a reserved name. If this is the case, change it to something else and save. Excel will change the name back automatically. When we now run the timer job again and go to the PowerPivot Management Dashboard, we have a fully populated dashboard!

This concludes the PowerPivot integration verification. In the next part of this series, we will play with even more awesome features: Power View!
Go back to overview.
Previous part: Configuring SharePoint.
Next part: Installing Reporting Services.

