


So what do you do when you have a nice little build lab with two parallel automated deployment pipelines that include unit testing, interface testing, deployments, smoke testing, load testing, static analysis, and automated sort-of QA and production deployments?
Take it to the cloud, of course.
(Well, and write a bunch of blog posts and a wiki page too)
Azure Setup
The target of this exercise was to get the project deploying automatically to the cloud, and I wasn’t particular about where. I decided that the free website feature in Azure would be a good target. Mostly due to the free part but also because I suspected it would be easy.
First up was creating an Azure account, which I did via WindowsAzure.com. The Web Sites feature is still in Preview mode, so I had to go the preview features and enable it.

WindowsAzure.com – Preview Features Option
The Web Sites option is at the bottom and enabled with a button and dialog:
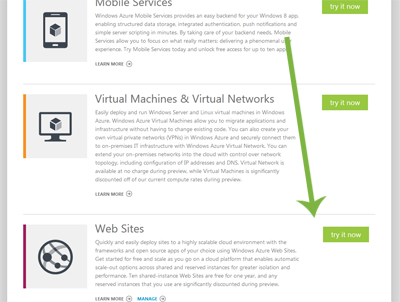
WindowsAzure.com – Preview Features
Once it’s enabled, I can go into the portal and when I press the “New” button at the bottom, I’ll have options to create a new Web Site instance.
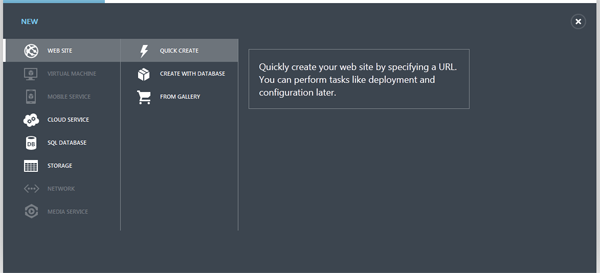
WindowsAzure.com – New Website
After creating the new site, it will provision and show up in my dashboard:
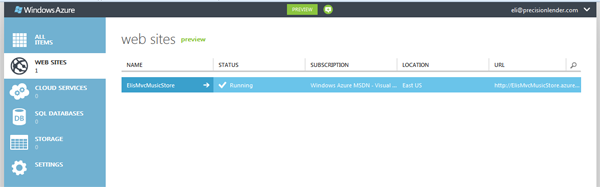
WindowsAzure.com – Dashboard
That’s all it takes to have a new Web Site in Windows Azure. Of course it’s not doing anything useful at the moment, so lets go back to the build process and fix that.
Build Process Changes
Because I chose to use an Azure Web Site, the build changes are going to be minimal. Microsoft intends us to use the Publish feature in Visual Studio or Web Matrix to deploy our websites, so they give us all the settings we need to run the msdeploy executable from a build step instead.
In the properties dashboard for the new website above, there is a link to download the publish settings for the site and a link to setup credentials. First setup the credentials, then click the download link to download the publish settings. These settings are intended for Visual Studio or Web Matrix, but being XML we can read the file and pluck out the important values.
I made a copy of my final “Deploy to Production” step and modified the msdeploy step to use a new Param file. The Param file is used during the deployment to set the IIS name and connection strings, you can see all of them on BitBucket.
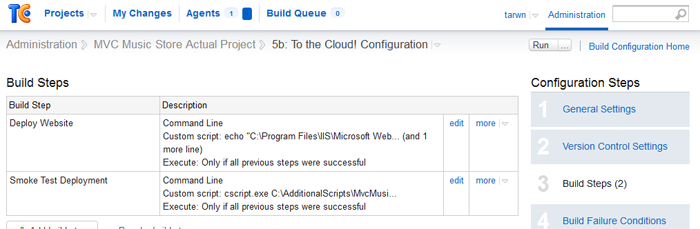
TeamCity Build Steps
MSDeploy Command (TeamCity version):
"C:Program FilesIISMicrosoft Web Deploy V2msdeploy.exe" -source:package='%system.teamcity.build.workingDir%PriorArtifactsMvcMusicStore.zip' -dest:auto,computerName='%COMPUTER%',userName='%USERNAME%',password='%PASSWORD%',includeAcls='False',authtype=basic -allowUntrusted -verb:sync -disableLink:AppPoolExtension -disableLink:ContentExtension -disableLink:CertificateExtension -setParamFile="%system.teamcity.build.workingDir%PriorArtifactsMvcMusicStore.AZUREWEBSITE.xml" -enableRule:DoNotDeleteRule
I then updated the Configuration Parameters to reflect the Azure credentials and URL so the deployment and smoke test would work properly and entered the username and password entered in the Azure Dashboard in the prior step.

TeamCity Configuration Parameters
And that’s it, probably the fastest on premises to cloud change. Press the build button in TeamCity and we have a green build to the cloud:

TeamCity Build Successful
And after a similar set of changes in Jenkins, I have a parallel production step that targets Azure as well:
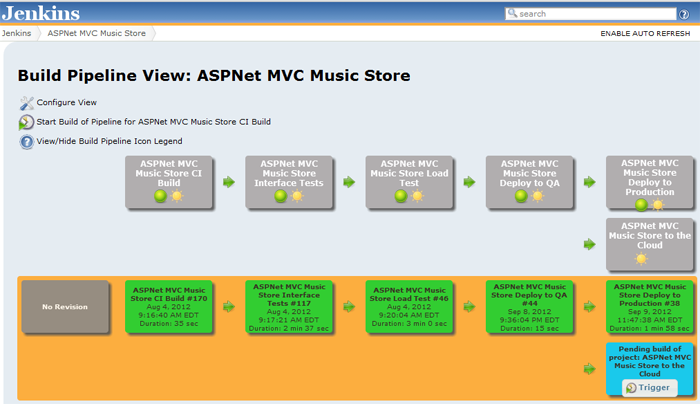
Jenkins Build Pipeline
And of course I had to push the button a few times:

Jenkins Build Success
You can see the site here: http://elismvcmusicstore.azurewebsites.net
Note: It will probably load slowly. It’s on a shared node and seems to go to sleep since it gets visited so infrequently. If I felt like paying for it, it’s just a toggle button away from running as a reserved instance (and another to scale it up to multiple instances)
That was the easy button version
Despite the fact that I chose the easiest possible target, as long as we can script the deployment we can easily add it into the pipeline and know that our deployment is taking exactly the same steps every time it deploys. Whether we were instead deploying to an Azure web role, deploying EC2 instances, or pushing to another provider, we have the framework to do so consistently and safely.
 My roles have included accidental DBA, lone developer, systems architect, team lead, VP of Engineering, and general troublemaker. On the technical front I work in web development, distributed systems, test automation, and devop-sy areas like delivery pipelines and integration of all the auditable things.


