


The Nuget Package Manager console is a great way to do anything powershell straight from the Visual studio IDE. And that little window supports just about anything you can do with powershell. It can even use posh-git. Inspired by the post the Hanseldude did I went out and tried if I could get that to work. And it’s actually very easy.
I downloaded the posh-git files from github and saved them on my C drive under posh-git.
I then went to the Nuget Package Manager Console and did cd c:posh-git after which I did the powershell thing .install.ps1 and that added the following lines to my profile.
```powershell
Load posh-git example profile
. ‘C:posh-gitprofile.example.ps1’```
You can see what it did with doing notepad $profile. It should even create a profile if you don’t already have one, but I did not test that for the Nuget Package Manager Console.
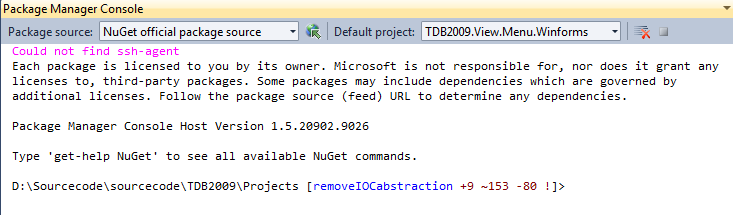
And after a restart of Visual studio it just works.
And even tab-completion now works for git.

The only thing to do now is to change the default colorscheme of posh-git to something that is better for a white background. But I hear from Keith Dalby that that should not be a problem and that he already has one.
You can also change the prompt to your liking.
And don’t forget you can also make the git experience a bit better when working with Visual studio by using my superfamous git shortcuts that I also have in my $profile file. I blogged about that before, even twice. Here is my latest version.
```powershell Function solutionworkingdirectory() { split-path -parent $dte.Solution.FileName | cd }
Function checkout($branch) { solutionworkingdirectory write-host “Closing solution” $filename = $dte.Solution.FileName $dte.Solution.Close() write-host “Adding files” git add . write-host “Commiting files” git commit -a -m “auto commit before checkout” write-host “Checking out” git checkout $branch write-host “Reopening solution” $dte.Solution.Open($filename) }
Function branch($branch) { if($branch) { solutionworkingdirectory write-host “Creating branch” git branch $branch } else { solutionworkingdirectory write-host “Showing branches” git branch } }
Function commit($message) { solutionworkingdirectory write-host “Adding files” git add . write-host “Commiting files” git commit -a -m “$message” }
Function push() { solutionworkingdirectory write-host “Pushing master to origin” git push origin master }``` So there it is. Git and powershell and Visual studio all in one little blogpost.
Edit: Changing the colors is actualy very easy. Just go to the posh-git folder and open GitPrompt.ps1 there you can easily change the colors. I use these for now.
```powershell
BeforeText = ‘ [’
BeforeForegroundColor = [ConsoleColor]::Black
BeforeBackgroundColor = $Host.UI.RawUI.BackgroundColor
DelimText = ‘ |’
DelimForegroundColor = [ConsoleColor]::Black
DelimBackgroundColor = $Host.UI.RawUI.BackgroundColor
AfterText                 = ']'
AfterForegroundColor      = [ConsoleColor]::Black
AfterBackgroundColor      = $Host.UI.RawUI.BackgroundColor

BranchForegroundColor       = [ConsoleColor]::Blue
BranchBackgroundColor       = $Host.UI.RawUI.BackgroundColor
BranchAheadForegroundColor  = [ConsoleColor]::Green
BranchAheadBackgroundColor  = $Host.UI.RawUI.BackgroundColor
BranchBehindForegroundColor  = [ConsoleColor]::Red
BranchBehindBackgroundColor  = $Host.UI.RawUI.BackgroundColor

BeforeIndexText           = ""
BeforeIndexForegroundColor= [ConsoleColor]::DarkGreen
BeforeIndexBackgroundColor= $Host.UI.RawUI.BackgroundColor

IndexForegroundColor      = [ConsoleColor]::DarkGreen
IndexBackgroundColor      = $Host.UI.RawUI.BackgroundColor

WorkingForegroundColor    = [ConsoleColor]::DarkRed
WorkingBackgroundColor    = $Host.UI.RawUI.BackgroundColor

UntrackedText             = ' !'
UntrackedForegroundColor  = [ConsoleColor]::DarkRed
UntrackedBackgroundColor  = $Host.UI.RawUI.BackgroundColor
```
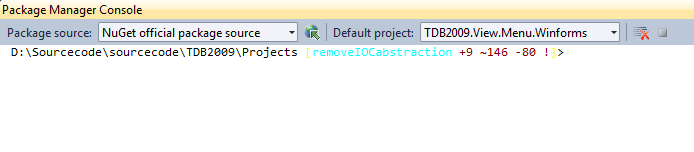
And this is what it looks like.
 Chris is awesome.
