


In this post we are going to take a look at how to export data into files. We are going to export data in json format as well as in csv format. To get started first connect to mongodb and create a new database named ExportDB
You can just execute the following to create this database
use ExportDB
You should get a message like the following
switched to db ExportDb
Insert these 5 items
db.Person.insert( { name : "Denis",  age : 20, city : "Princeton" } )
db.Person.insert( { name : "Abe",    age : 30, city : "Amsterdam" } )
db.Person.insert( { name : "John",   age : 40, city : "New York"  } )
db.Person.insert( { name : "Xavier", age : 10, city : "Barcelona" } )
db.Person.insert( { name : "Zen",    age : 50, city : "Kyoto"     } )
Now it is time to do the export. To do the export we will use the mongoexport utility, you can find this in the bin directory of your MongoDB install. I my case it is in the C:NoSQLmongodbbin directory. Open up a new command window and cd into the folder where mongoexport is located.
Export in json format
To export the data, we need to tell mongoexport what database to use, what collection to use and optionally we also need to specify what fields to use. If you don’t specify the fields, you will get all of them. If we wanted to export the name and age fields from the Person collection in the ExportDb database, you would specify it like this
mongoexport --db ExportDb --collection Person -fields name,age
Here is the output
C:NoSQLmongodbbin>mongoexport --db ExportDb --collection Person -fields name,age
connected to: 127.0.0.1
{ "_id" : { "$oid" : "510e5da10e0a53ddf5f2865b" }, "name" : "Denis", "age" : 20 }
{ "_id" : { "$oid" : "510e5da20e0a53ddf5f2865c" }, "name" : "Abe", "age" : 30 }
{ "_id" : { "$oid" : "510e5da20e0a53ddf5f2865d" }, "name" : "John", "age" : 40 }
{ "_id" : { "$oid" : "510e5da20e0a53ddf5f2865e" }, "name" : "Xavier", "age" : 10 }
{ "_id" : { "$oid" : "510e5da80e0a53ddf5f2865f" }, "name" : "Zen", "age" : 50 }
exported 5 records
As you can see you got the output in the window. What about a file? You can use -o with the filename to redirect output into a file, all we are adding is -o Person.txt to the previous command
mongoexport --db ExportDb --collection Person -fields name,age -o Person.txt
Here is the output
C:NoSQLmongodbbin>mongoexport --db ExportDb --collection Person  -fields name,age -o Person.txt
connected to: 127.0.0.1
exported 5 records

C:NoSQLmongodbbin>
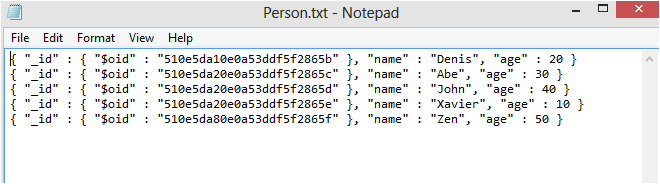
If you now locate the file in the bin directory and open the file, you should see something like this
Export in csv format
Exporting in csv format is pretty much the same as before with the addition of –csv. Our command will look like this
mongoexport --db ExportDb --collection Person --csv -fields name,age
Here is the output
C:NoSQLmongodbbin>mongoexport --db ExportDb --collection Person --csv -fields name,age
connected to: 127.0.0.1
name,age
"Denis",20.0
"Abe",30.0
"John",40.0
"Xavier",10.0
"Zen",50.0
exported 5 records

C:NoSQLmongodbbin>
Just like before we want to direct the output into a file instead of onto the screen, we will just add -o Person.csv to the command , the command will look like this
mongoexport –db ExportDb –collection Person –csv -fields name,age -o Person.csv
C:NoSQLmongodbbin>mongoexport --db ExportDb --collection Person --csv -fields name,age -o Person.csv
connected to: 127.0.0.1
exported 5 records

C:NoSQLmongodbbin>
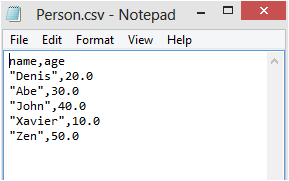
Now if we open up the file in notepad you will see the following
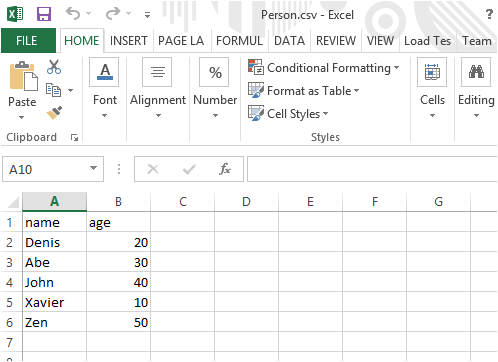
If you open up the file in Excel, it will look like this
There you have it, if you want to quickly export some data into file, you can use the mongoexport utility to accomplish that
That is all for this post, if you are interested in my other MongoDB posts, you can find them here:
Install MongoDB as a Windows Service
How to sort results in MongoDB
Indexes in MongoDB: A quick overview
Multidocument updates with MongoDB
MongoDB: How to include and exclude the fields you want in results
MongoDB: How to limit results and how to page through results
MongoDB: How to backup and restore databases
 Denis has been working with SQL Server since version 6.5. Although he worked as an ASP/JSP/ColdFusion developer before the dot com bust, he has been working exclusively as a database developer/architect since 2002. In addition to English, Denis is also fluent in Croatian and Dutch, but he can curse in many other languages and dialects (just ask the SQL optimizer) He lives in Princeton, NJ with his wife and three kids.

